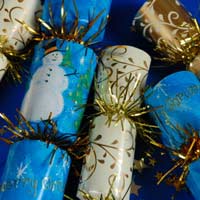
How to Make a Christmas Cracker

Crackers are a Christmas tradition that young and old enjoy equally. No Yuletide table seems properly dressed without them and Christmas just wouldn’t be Christmas without the obligatory bad cracker joke! But rather than spend out on shop-bought commercial crackers, why not have a go at making them yourself? It’s simple, enjoyable and much more personal.
Gift Ideas
The wonderful thing about home-made Christmas crackers is that not only can you match your chosen décor perfectly but you can also tailor the gifts inside to the person who will pull them. For instance, for the Mother-in-Law, you could put in a tiny lavender bag, her favourite brand of lipstick or that packet of seeds she wants. Meanwhile, the men in your life might prefer a voucher to download a music track or film, whereas inexpensive accessories suit teens, and sweets are popular with everyone!Themed Christmas Crackers
An alternative option to cracker gifts would be to design a theme. For instance, you could create a game whereby different parts of a puzzle or clues to a conundrum are put in all the crackers and have to be put together and solved once they are all pulled. Another idea might be for each person to receive a pack of sunflower seeds to start a family competition to grow the tallest in the summer, or each a different pack of vegetable seeds they grow in readiness for a family summer barbecue…anything is possible; the important thing is to use your imagination and to have fun!Materials Needed
- Roll of cardboard cut to three equal lengths or the inner tubes of toilet rolls.
- Covering of your choice.
- Cracker snaps (available from good craft suppliers and joke shops).
- Sweets, novelties, surprise gifts, jokes for the inside.
- Glue or double-sided sticky tape.
- Ties pre-cut in lengths enough to tie around the cracker.
- Extra bits and pieces of choice for decoration.
Choosing the Look
Before making the cracker, decide on what kind of look you are aiming for. There are endless choices available, from a traditional effect using red, green or gold wrapping paper, to choosing paper to match a more modern table décor of white, silver or purple – or perhaps to go with a more natural feel by using brown packaging paper and raffia. Whatever you decide, a slightly stiffer construction paper works better and is easier to handle than very flimsy papers. If a more delicate feel is desired, ‘softer’ effect papers, such as tissue, can be overlaid afterwards.Once you have chosen your paper, cut as many pieces as you want finished crackers to approximately 33cm x 17cm, or wide and long enough to comfortably cover the three toilet tubes.
How to make the Cracker
1. To make the basic cracker, first lay your chosen cracker covering face down on a table. Then place three toilet tubes end-to-end length-ways across the middle of the paper. Gently insert one cracker snap to pass through all three tubes.2. Next, gently bring one edge of the covering paper upwards and stick to the central cardboard roll only, leaving the others in place, but unsecured. Then do the same to the other side of the paper, so that you have a roll of decorative paper, with the cardboard inserts providing the shape and length.
3. Taking a tie (you can use string, ribbon, raffia or anything else that takes your fancy), find the gap between tubes at one end and carefully place it around the cracker and pull until gathered in the middle. You can then tie the ends in a bow and trim or curl as desired.
4. This is the time to add your gifts via the other, open, end. You can use anything you like, either sticking to the tradition of a paper hat, joke and novelty, or personalising for each guest. Remember that whatever you choose must fit through the end of the cracker and shouldn’t be too heavy. Then, once everything is inside, take a second tie and close the remaining end securely, after which, remove the two cardboard end pieces, leaving the finished cracker. (The two ‘shapers’ can be used again for the next cracker.
5. If you wish, you can then add any finishing decorative touches, such as labelling each with the names of your guests, sprinkling a touch of glitter on them or sticking sequins or other motifs along the sides.
One final word of warning; once you’ve tried making your own crackers, guests will never let you buy shop-bought ones again! So, in the grand tradition of bad cracker jokes, may we at Lovely Christmas, wish you a Cracking good time!
Just in case you're interested in a bit of Christmas history, we've investigated how the christmas cracker came about.


